Entry 003: “All is Vanity” Part 3
In this entry I share links to my favorite tools and supplies, but these are not affiliate links or sponsored ads. I do not get any kind of monetary gain (or otherwise) from these recommendations. I am not associated with the brands or websites linked.
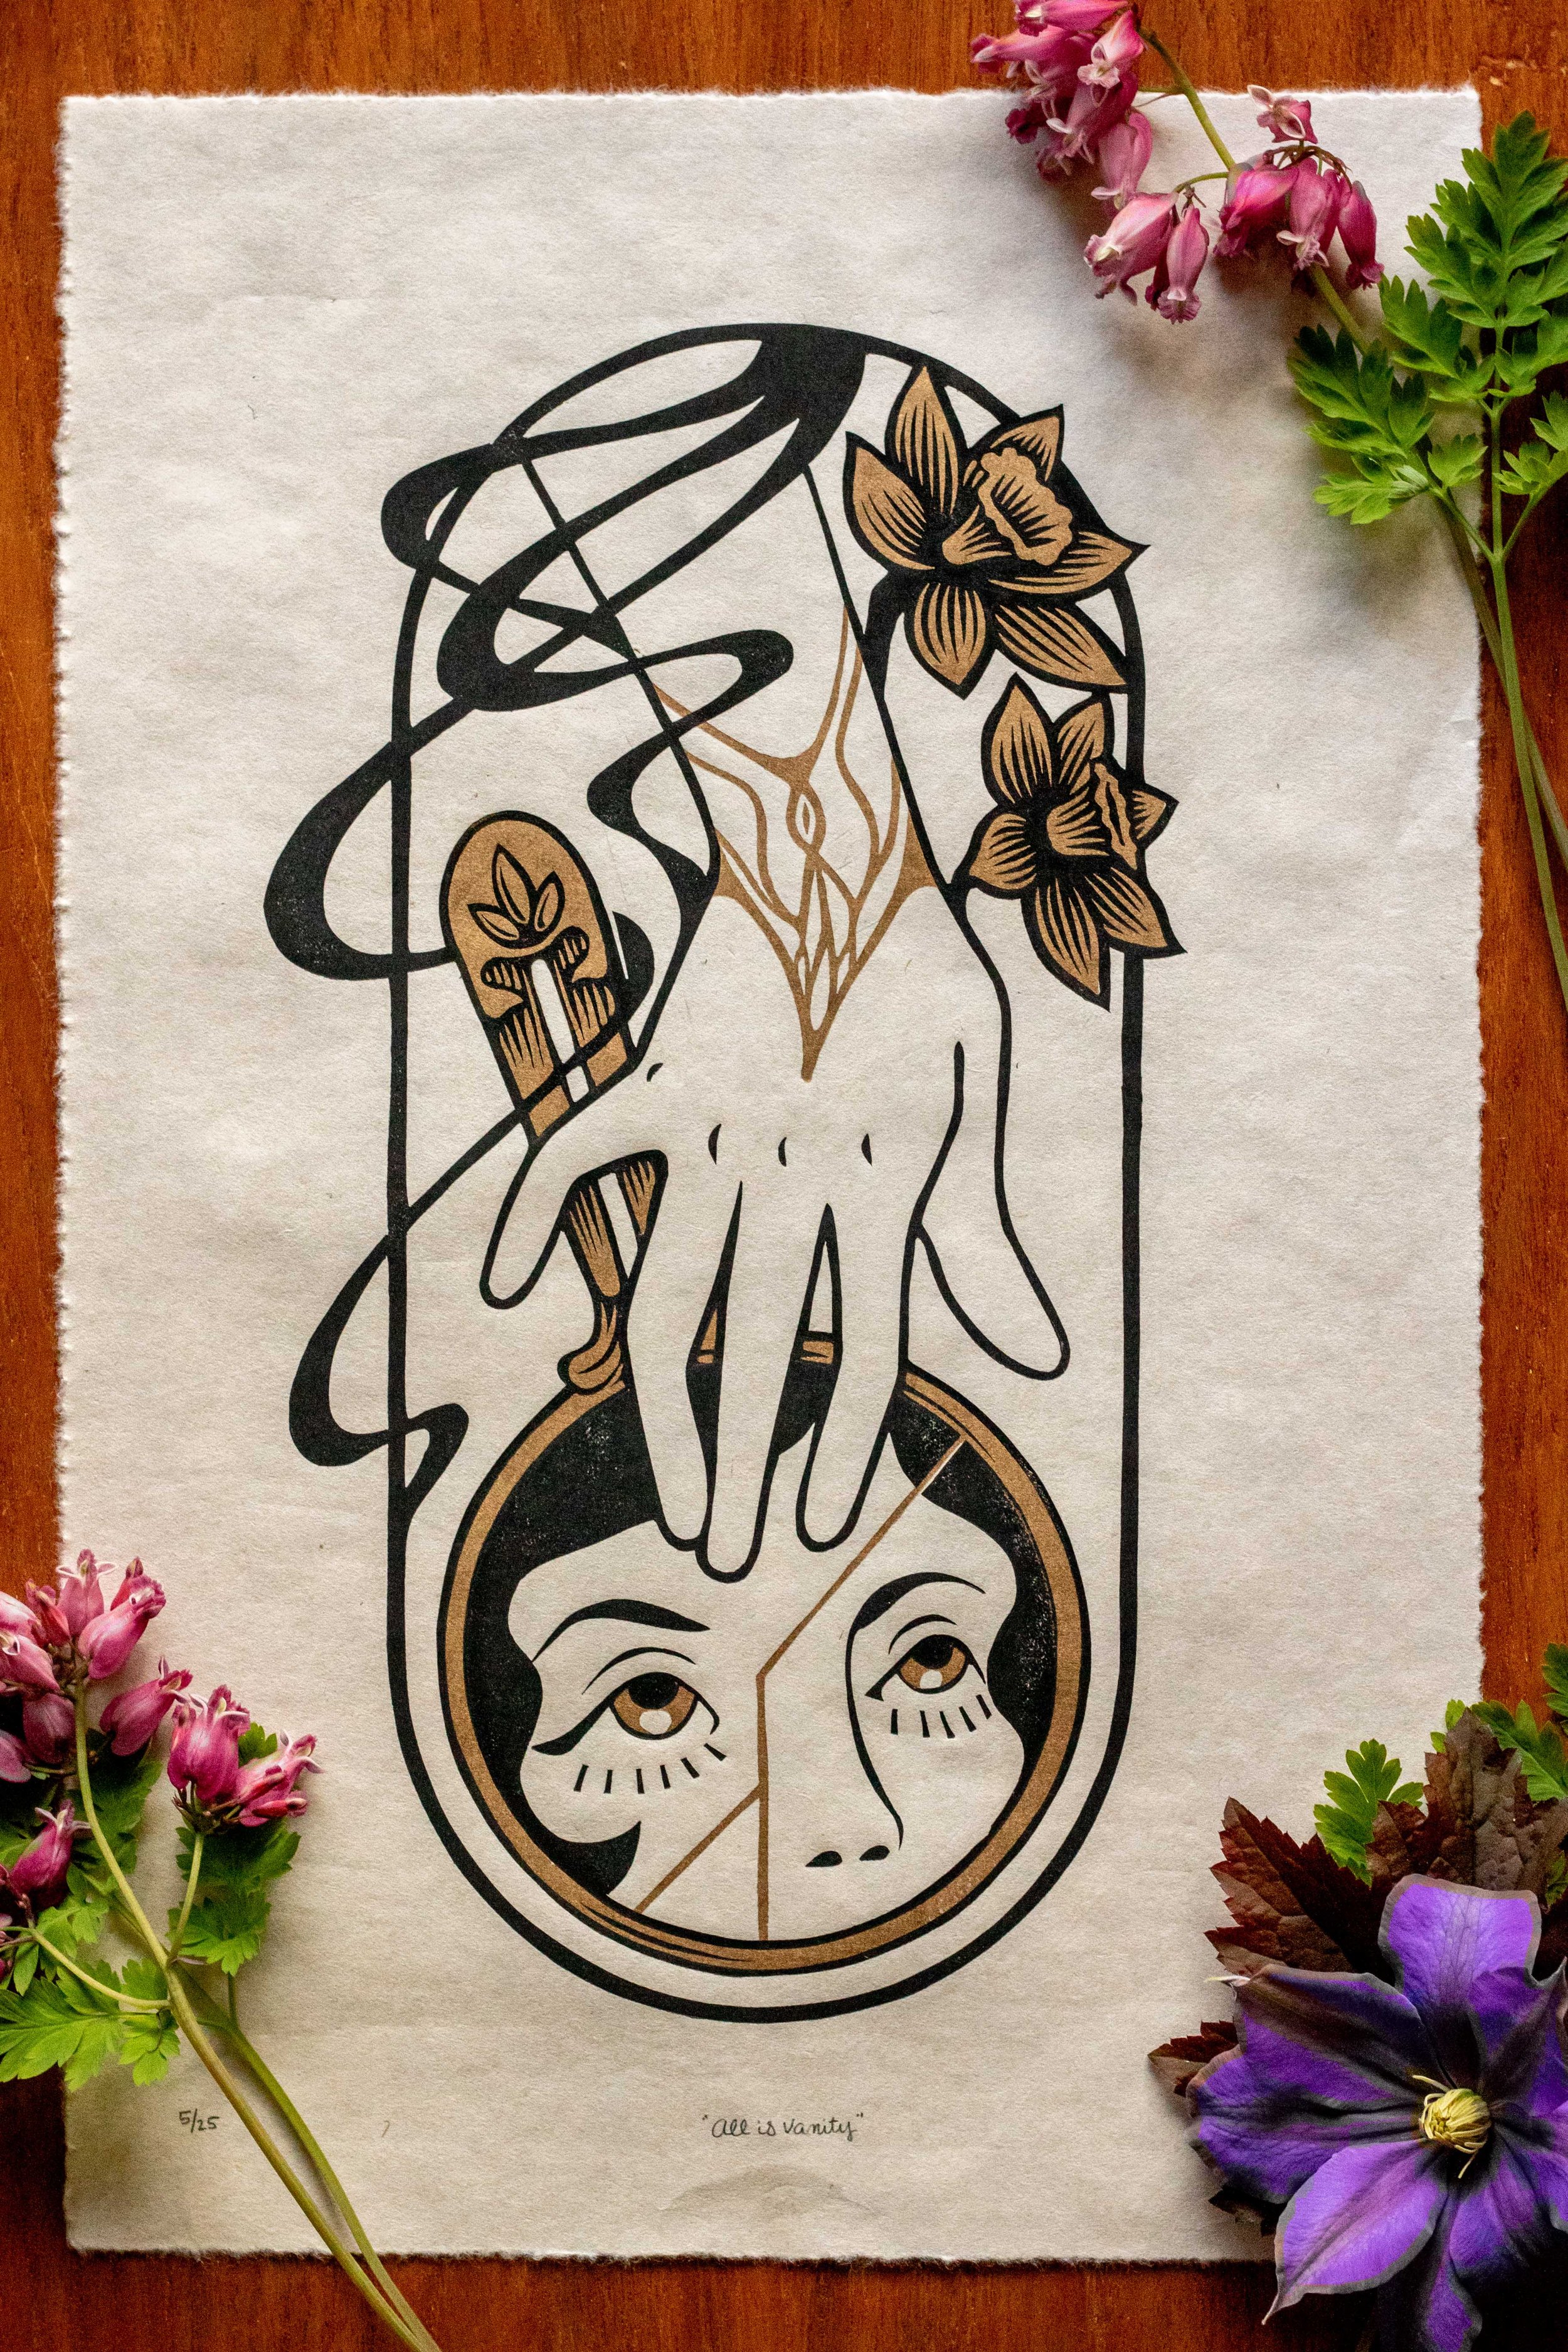
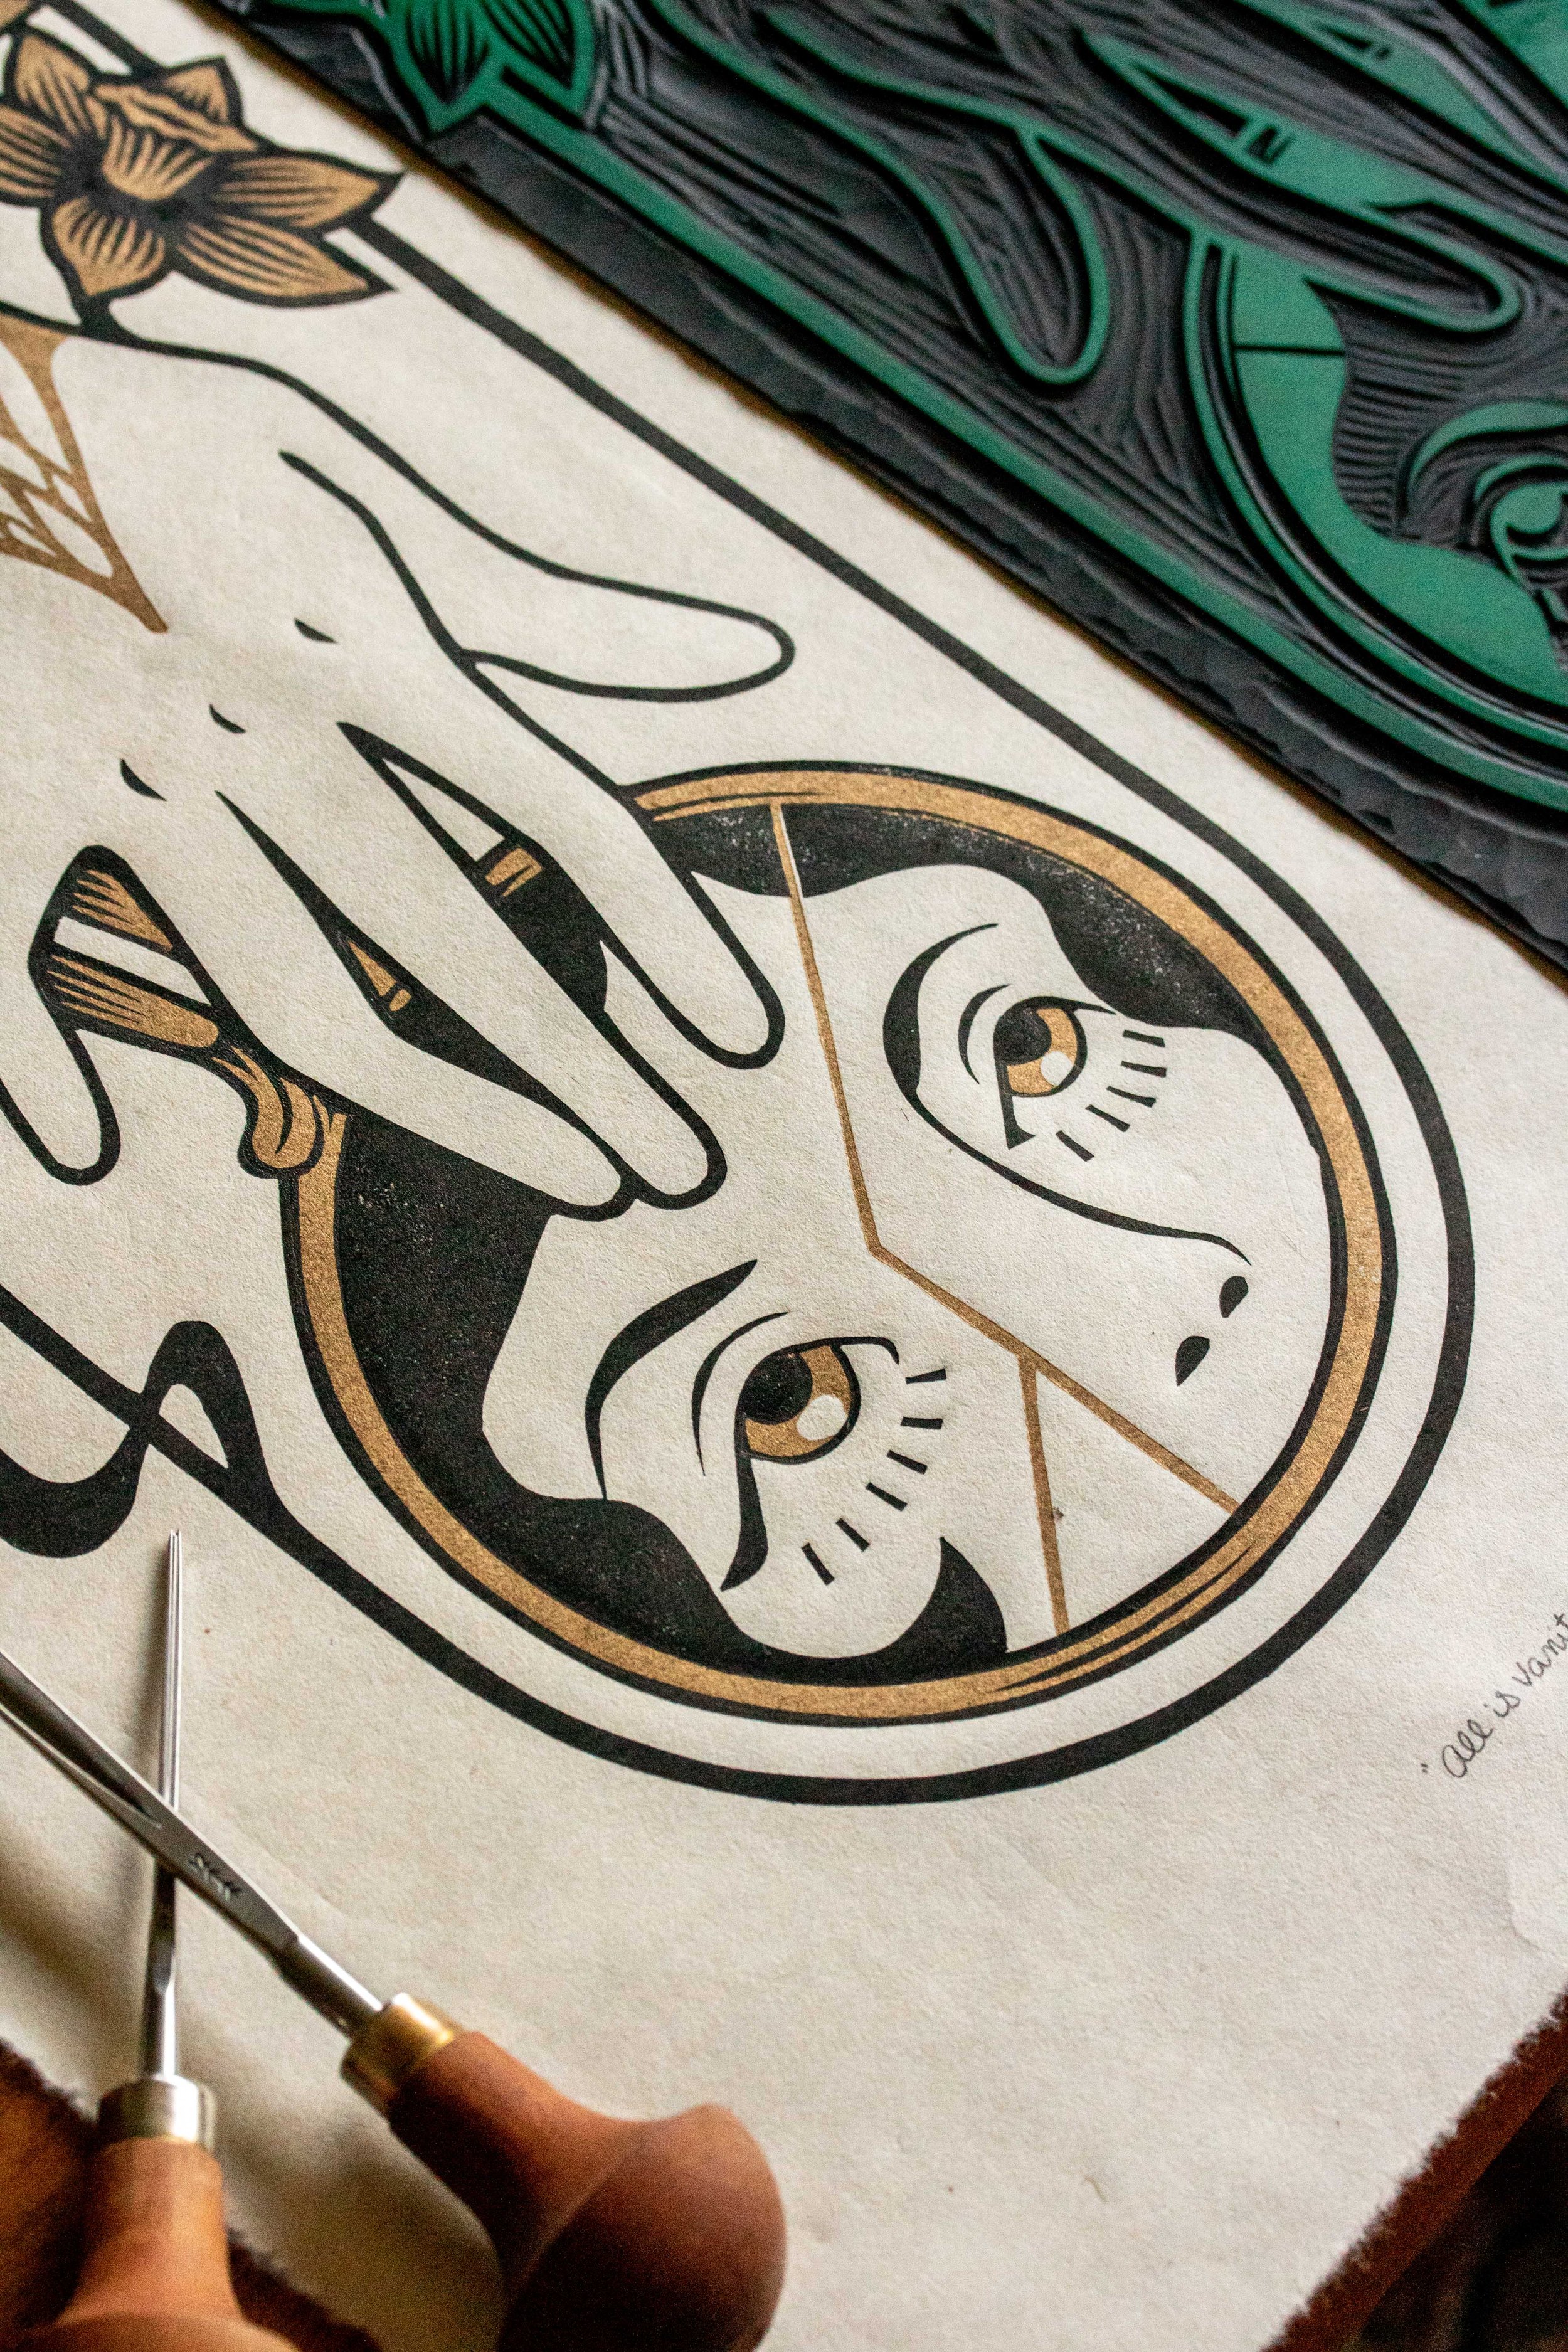
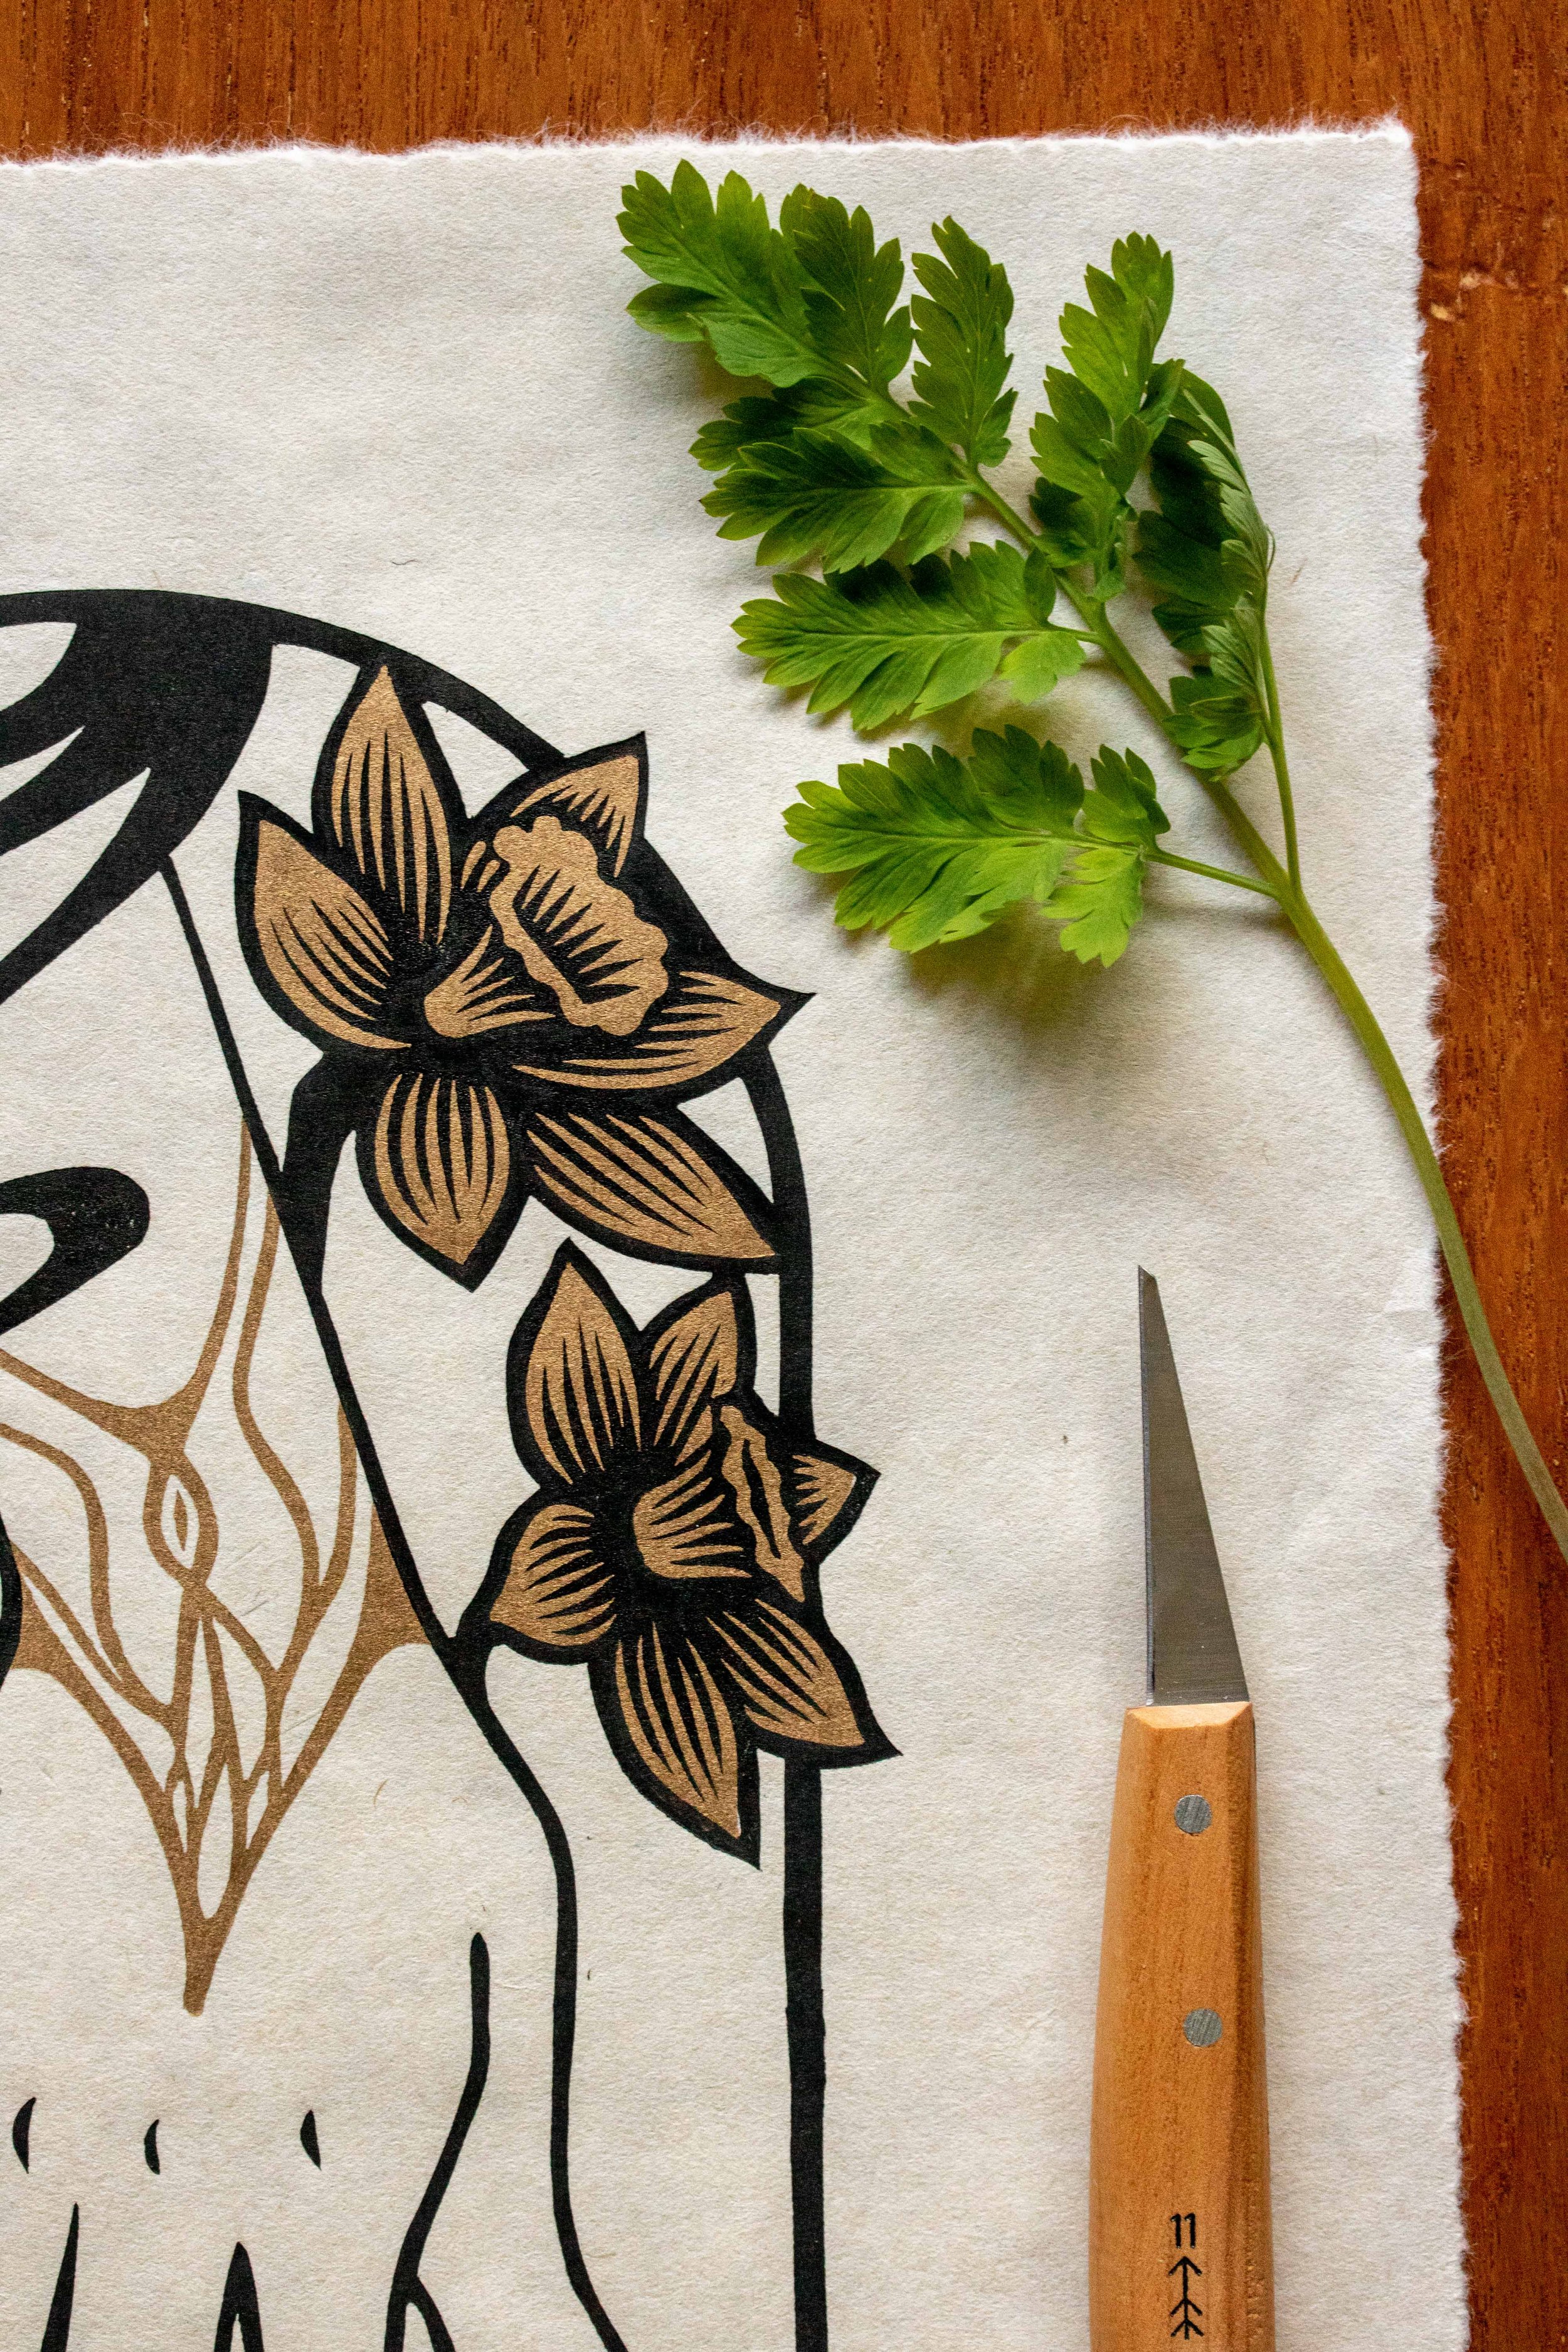
“All is Vanity” is a limited edition linocut print created in early 2023.
Previously…
Entry 001: “All is Vanity” Part 1: Concept, Sketch, and Transfer to the Block
Entry 002: “All is Vanity” Part 2: Carving, Paper Selection, Registration, and Preparing to Print

Step 10: Printing the First Layer
Recap: I use a very simple set up for registration— just a piece of chipboard to press the block up against with some guidelines drawn on it for lining up the paper. I use Ternes-Burton registration pins to keep the paper in the same place every time for printing both blocks.
The printing press pictured here is the famed Woodzilla press. I chose this one because it is relatively affordable, smaller and portable. I also love the look of it, it is very utilitarian but well designed and beautiful. Before I purchased this press, I was hand-burnishing every print fully by hand using a plastic Japanese baren and a wooden spoon. Now I still use the baren and wooden spoon but only as needed in trouble spots for a much shorter amount of time.

Step 11: Printing the Final Block
After printing the gold block, I allow the gold ink to fully dry before printing the final layer. I find that if I try to print wet on wet, sometimes the ink transfers to the new block or there isn’t as good of coverage with the second layer. Letting the first layer fully dry keeps everything a bit more clean and crisp.
I also love printing with black ink on these thinner handmade papers because I get a little preview of the design showing through the back as I press it into the block.

Step 12: Drying the Prints
I don’t have an official drying rack (that would be lovely but those are large!), so I set up a string in my studio with these IKEA clips. This was my first time using it but it worked really well to dry the prints up and out of reach of my studio cats.
I let these prints dry for a good few weeks. The places where the layers overlapped took the longest to dry, I suppose because the first layer served to make that area less absorbent for the second layer. If I were to do this again, I may try adding a touch more of the Cranfield Wax Drier to the ink to assist drying.

Step 13: Editioning, Titling, Signing
For this last step, I had to commit to the name “All is Vanity.” To be honest, I can’t imagine this design being named anything else since it was the name that inspired the print.
I counted up the number of prints that turned out well enough to edition, and it was about 26 of the 30+ prints. That’s a pretty good ratio actually! So I made the good prints into an edition of 25 and saved one for an artist proof. The rest I marked as “MP” (misprint) and stored away.
There’s no magic about it, but I love to use my Blackwing pencils to edition my prints because they make the occasion feel just a little more special!
Step 14: Final Photos
I take my own listing photos using my Canon T6s camera.
I always enjoy finding interesting items and/or flowers to pair with the new print to set the mood. For this photoshoot, I picked flowers from my back yard. I like to do several different images for the listing, including my tools, hand-carved blocks, and detail views. I think it really helps communicate the handmade nature of my prints as much as I can online.
“All is Vanity” is available for purchase now:
U.S.A.: https://www.esteldor.com/currentworks/p/all-is-vanity
International: https://www.etsy.com/listing/1476637723/all-is-vanity-limited-edition-linocut
As always, if you have any questions about my process feel free to reach out to me at grace@esteldor.com . I am happy to share!